Kids crafts are a fantastic way to keep your little ones engaged and foster their creativity. Whether you’re looking for simple kids crafts for beginners or more intricate projects to challenge their skills, there’s something for every age and interest.

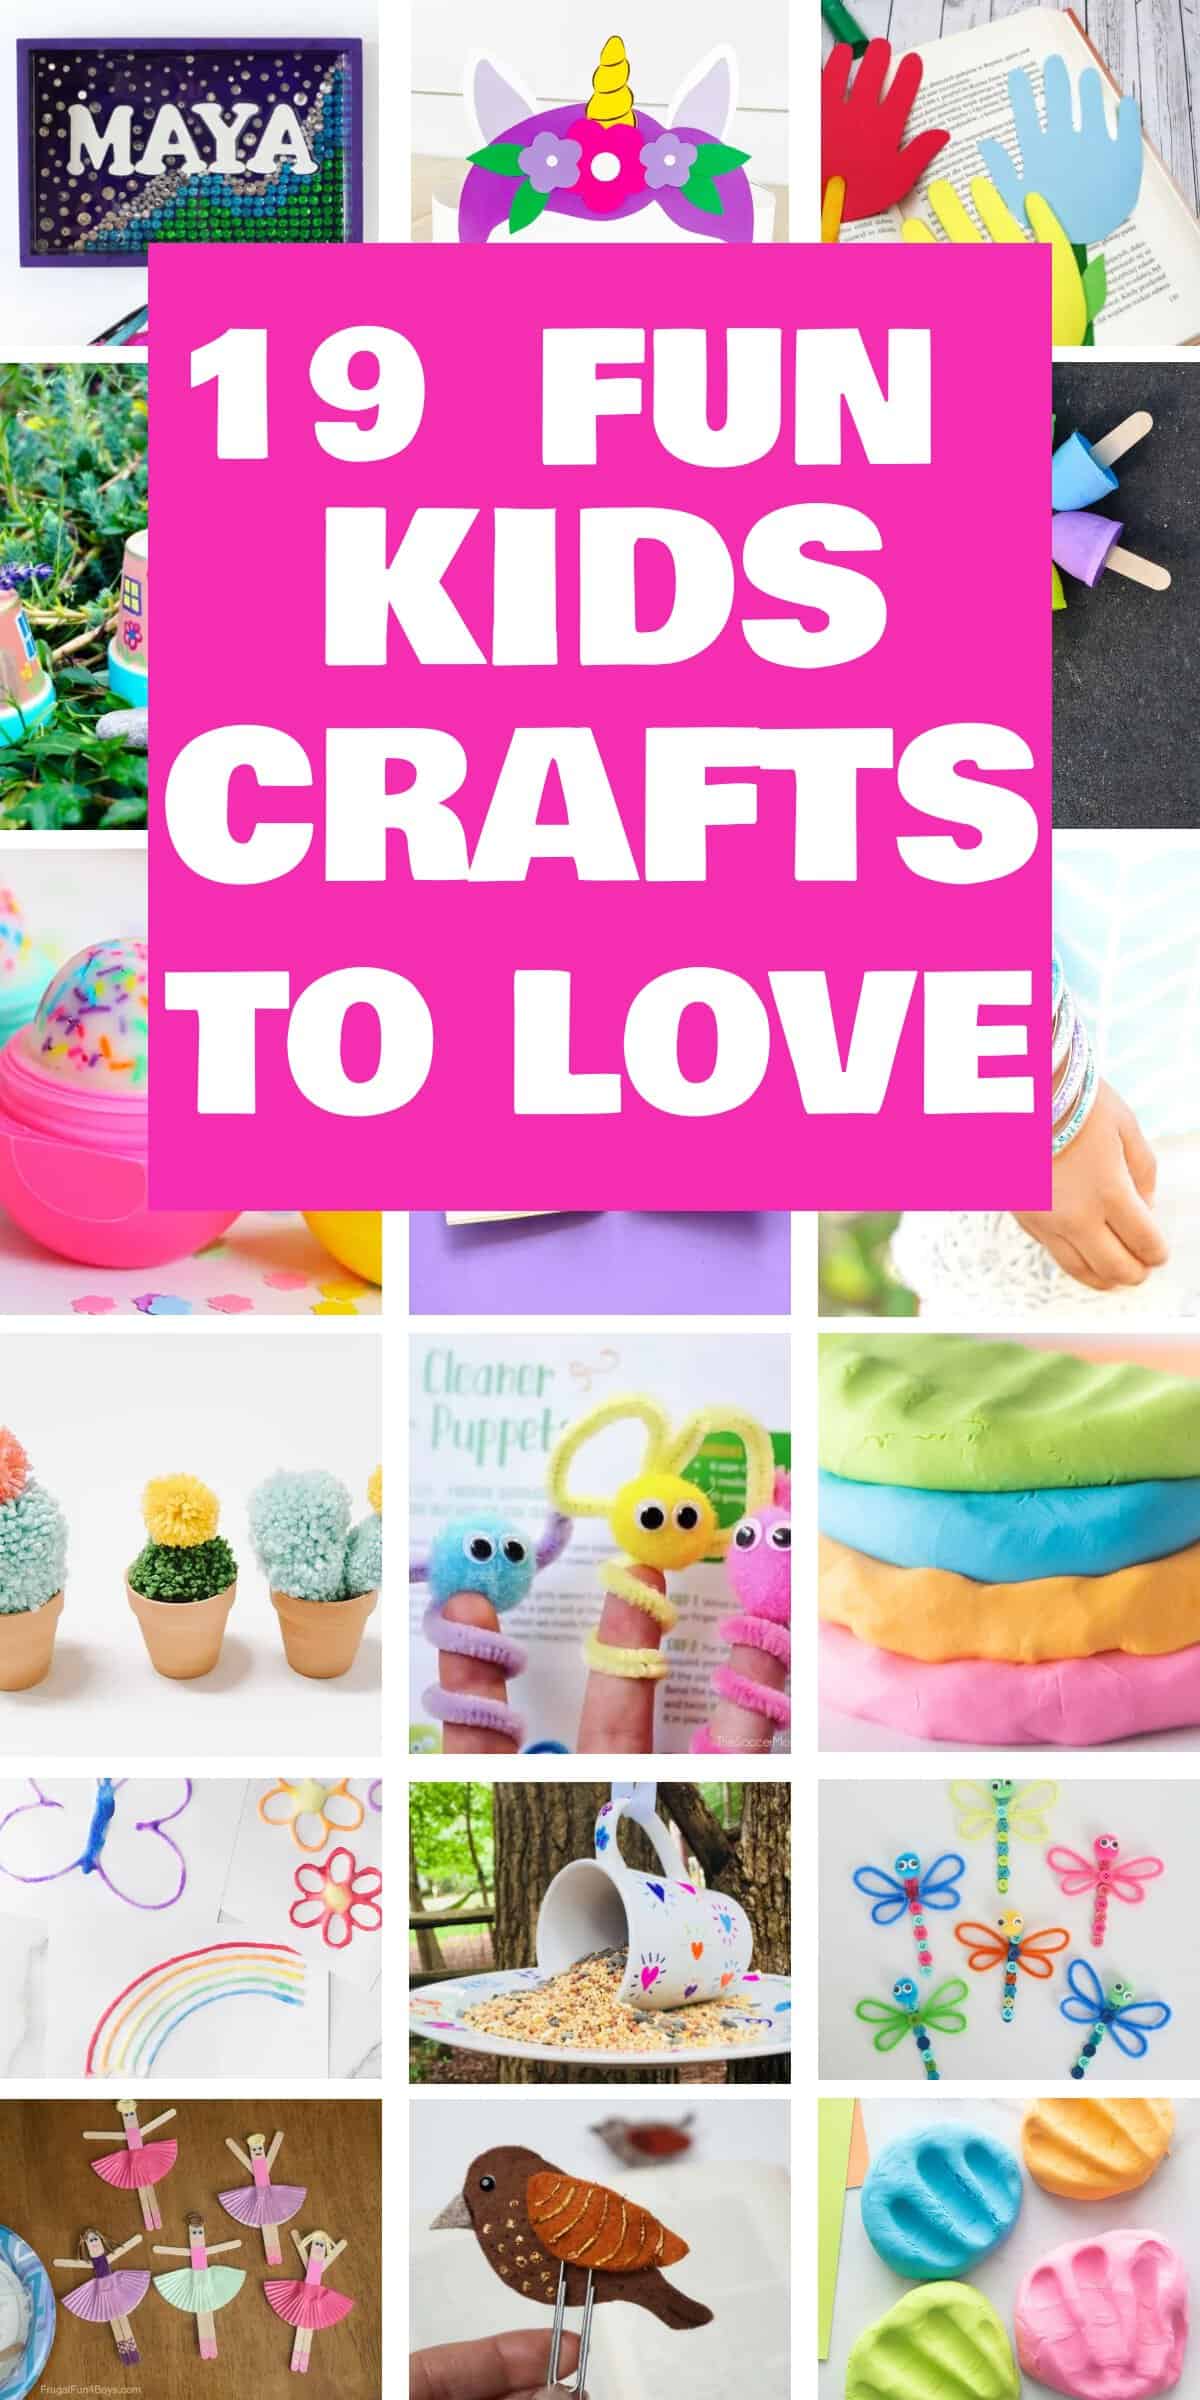
Kids Crafts for Creative Playtime
#19. Cloud Dough
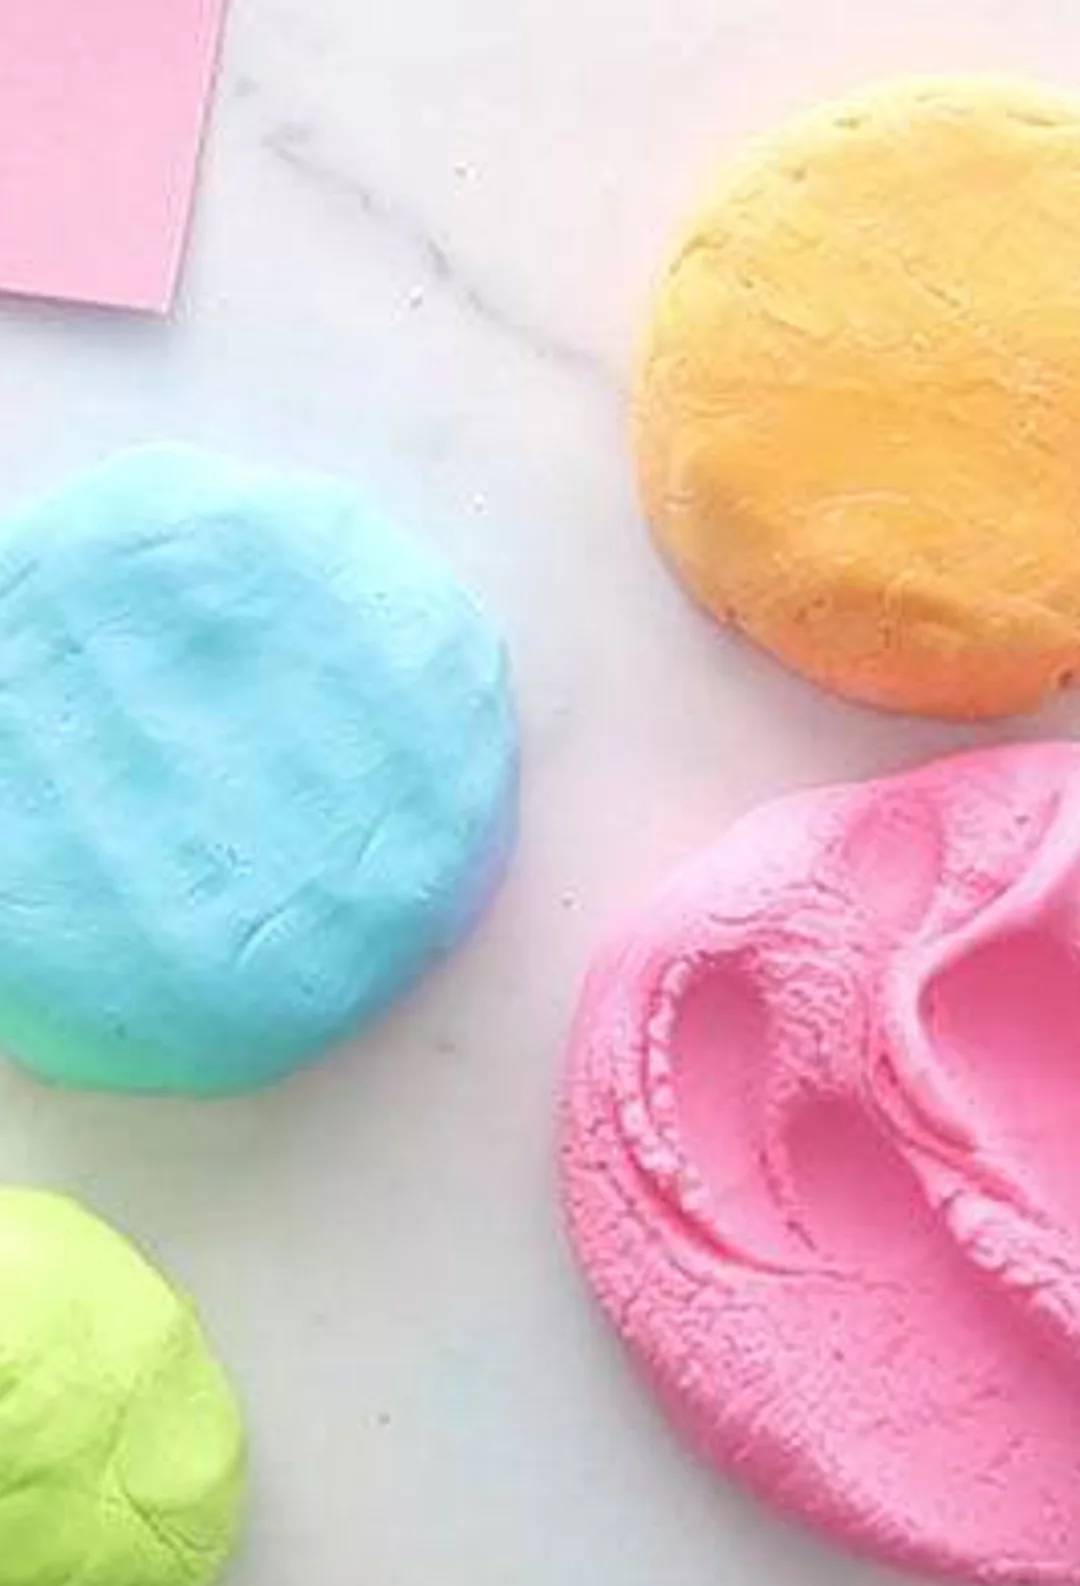
Ingredients:
- Cornstarch
- Lotion
- Food coloring (optional)
Recipe:
- Mix 1/2 cup lotion with 1-2 drops of food coloring (if desired).
- Add 1 cup cornstarch and mix until smooth.
- Knead until it reaches a dough-like consistency. Add more cornstarch if too sticky or more lotion if too crumbly.
Get the tutorial (with detailed steps and images)
#18. Sticky Nature Cards
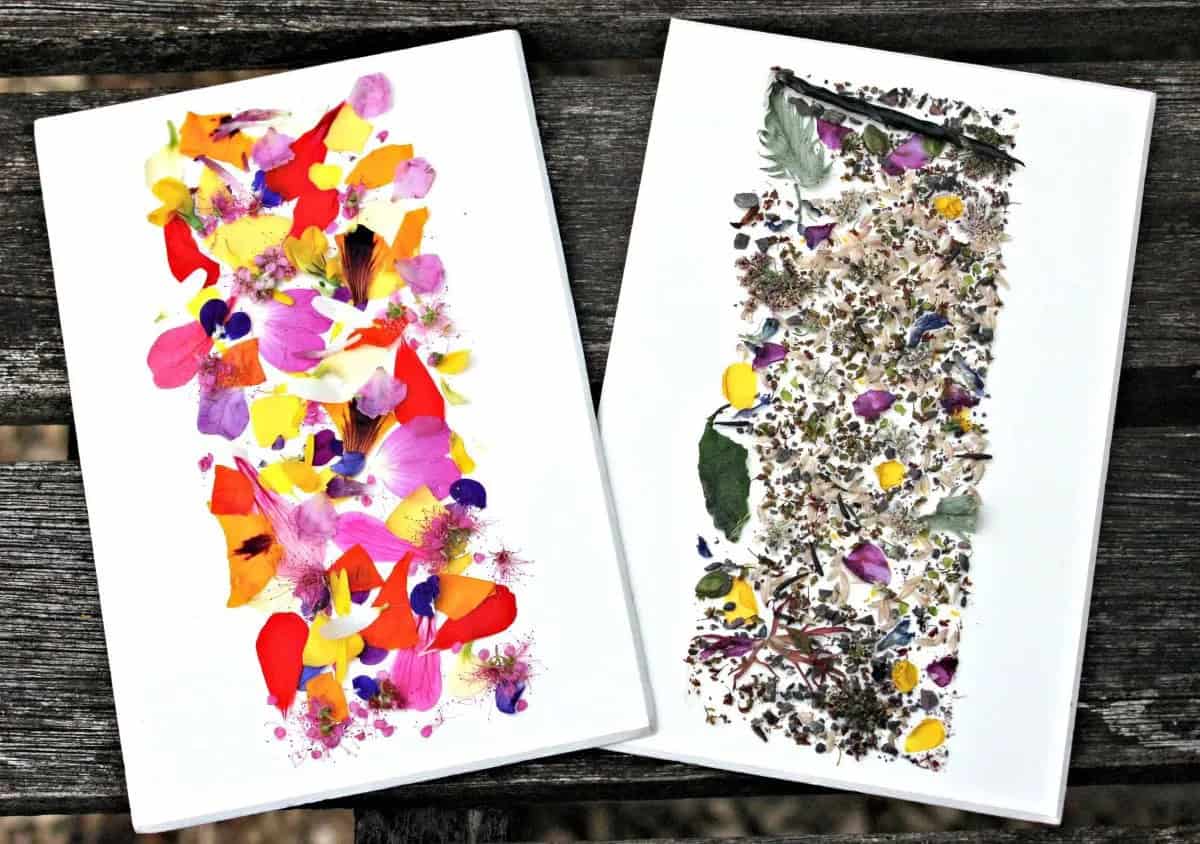
Sticky Nature Cards are a fun, portable kids’ craft that takes less than a minute to set up. Simply prepare a card with double-sided sticky tape, and you’re ready to go! In seconds, kids can explore the outdoors and stick leaves, flowers, or seeds to their cards.
You can set themes like leaf colors or seed types, or let them freestyle. This activity is perfect for teaching about nature while keeping kids creative and engaged. Plus, it’s easy to carry along for spontaneous fun when you’re out and about. Just be sure to remind them to avoid picking large or living plants!
Get the tutorial (with detailed steps and images)
#17. Outdoor Painted Fairy Houses

Supplies:
- Mini terra cotta pots
- Paint pens
- Outdoor craft paint
- Paintbrushes
- Weatherproof sealer (like Mod Podge)
Instructions:
- Place your fairy houses in special spots in your garden for a magical touch!
- Gather supplies. Paint the bottom part of your pot with outdoor craft paint (self-sealing and weatherproof is ideal) for a bright pop of color.
- Once dry, decorate with fine-tipped paint pens. Draw a door, windows, and add fun details like flowers and hearts.
- Seal with weatherproof sealer for added durability if your fairy houses will be outdoors.
Get the tutorial (with detailed steps and images)
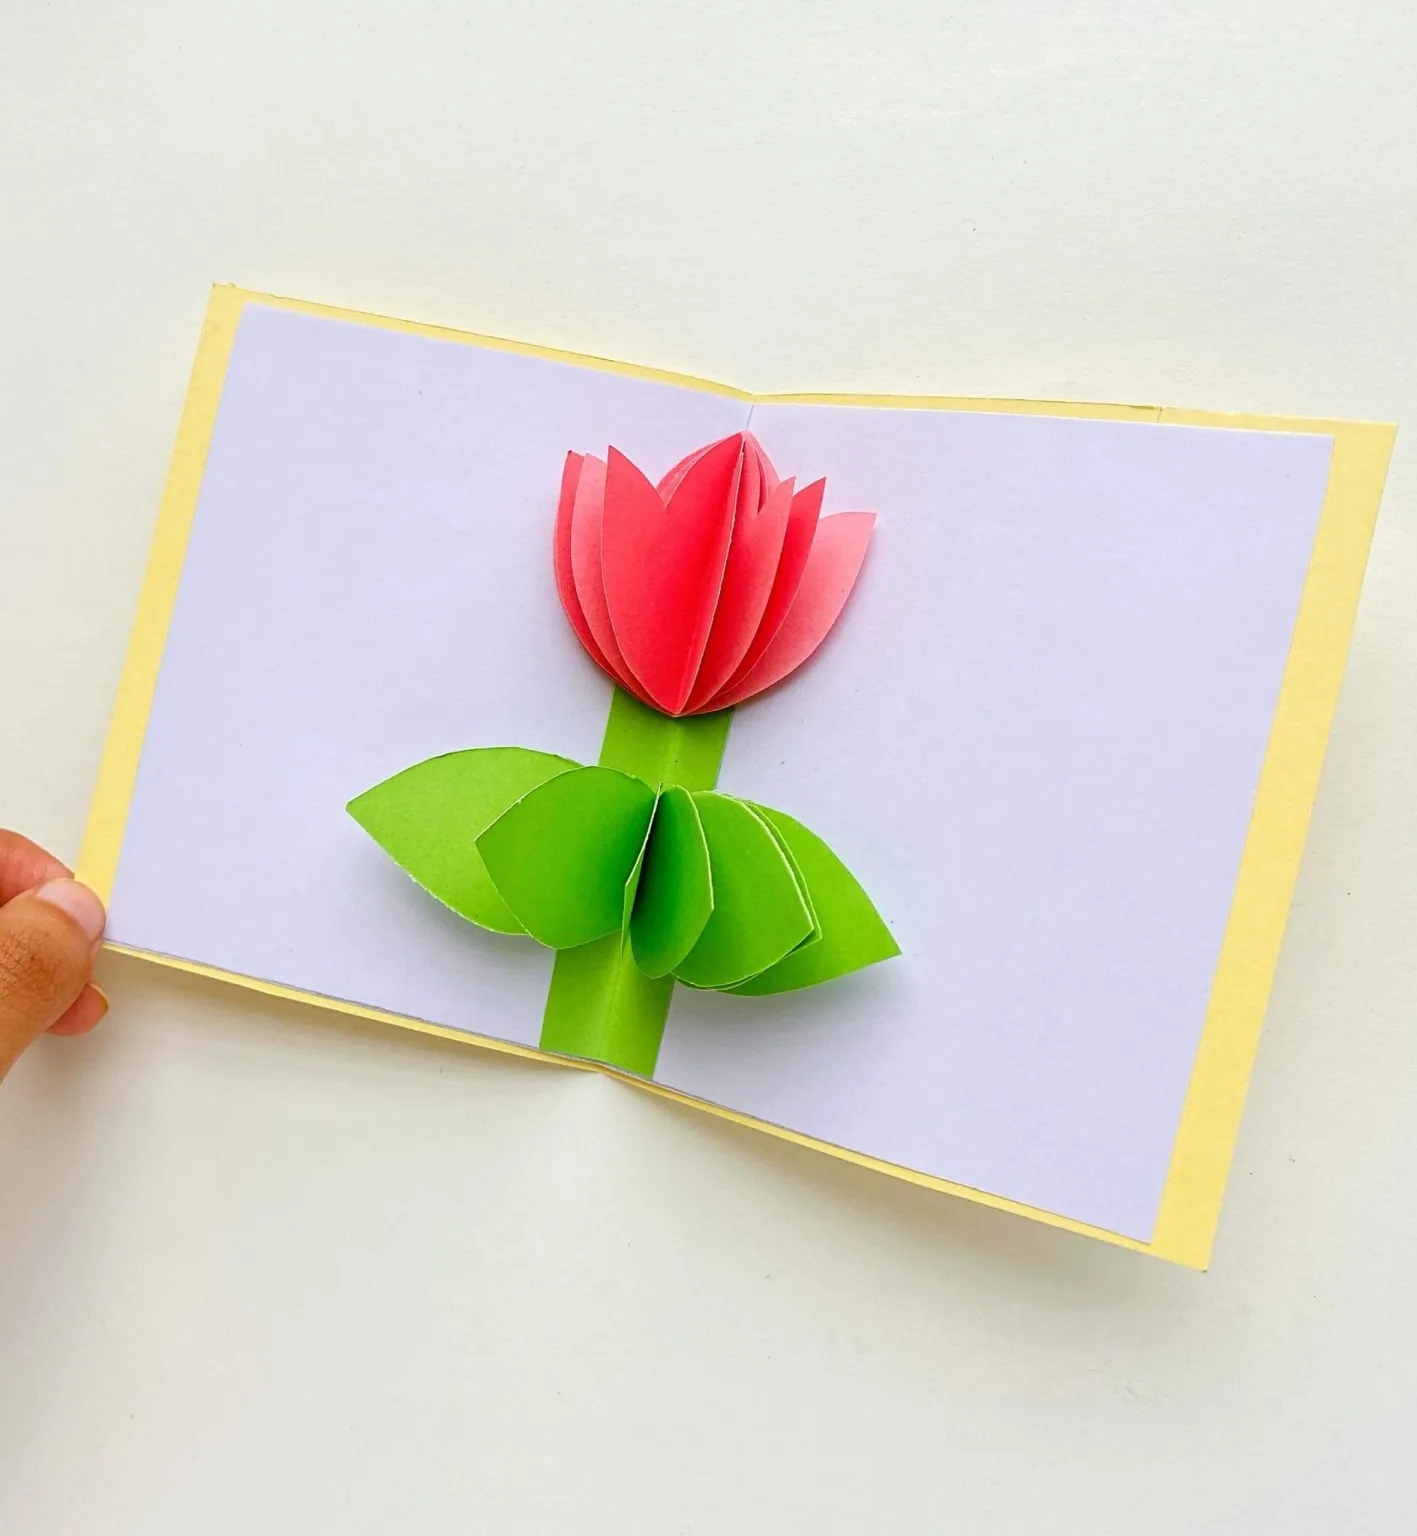
#16. Pop-Up Flower Card
Materials:
- Card-stock paper
- Craft paper
- Pencil
- Ruler
- Scissors
- Glue
Instructions:
- Use the PDF templates to cut out petals, leaves, and two pieces of card-stock paper (one slightly larger than the other).
- Fold the petals, stem, and leaves in half to create creases.
- Take the smaller card and proceed to the next step to complete your pop-up tulip card.
Get the tutorial (with detailed steps and images)
#15. DIY Sharpie Mug Bird Feeder

Supplies Used:
- White Stoneware Mug
- White Stoneware Plate
- Sharpie Oil-Based Paint Markers
- E6000 Craft Adhesive
Start by decorating the mugs and plates with Sharpie markers—this is a fun activity for kids of all ages! I drew the quote “It Takes a Big Heart to Teach Little Minds” for a teacher gift. Once decorated, use E6000 Craft Adhesive to attach the mug to the plate, securing it with a butter knife for 24 hours to dry.
After drying, tie a ribbon through the mug handle to hang the feeder. Add bird seed, and you’re ready to enjoy watching birds visit this adorable, DIY bird feeder! A simple, affordable craft perfect for summer fun.
Get the tutorial (with detailed steps and images)
#14. Shimmering Personalized Mermaid Wall Decor

We used shades of purple, blue, green, and silver, with sparkly gemstones and sequins that reminded us of mermaid scales. The wavy design, topped with EnviroTex Lite resin, gave it a shiny, water-like effect and hid any imperfections.
We also used the same resin to create mermaid-inspired nightlight shades, and the durable, easy-to-clean surface makes it perfect for a serving or catch-all tray too.
Get the tutorial (with detailed steps and images)
#13. Printable Unicorn Headband Craft

Supplies:
- White card stock
- Colored card stock (yellow, green, unicorn colors)
- Scissors
- Glue stick
- Staples or tape
- Unicorn headband template (download link at the end)
Directions:
- Attach additional pieces with staples or tape.
- Download, print, and cut out the unicorn headband template.
- Glue the unicorn’s mane to the top of the main headband piece.
- Attach the horn at the top, center of the mane.
- Glue the inner ear onto the white outer ear and place them behind the mane.
- (Optional) Add a floral crown by gluing the middle flower in front of the horn, with leaves on either side.
Get the tutorial (with detailed steps and images)
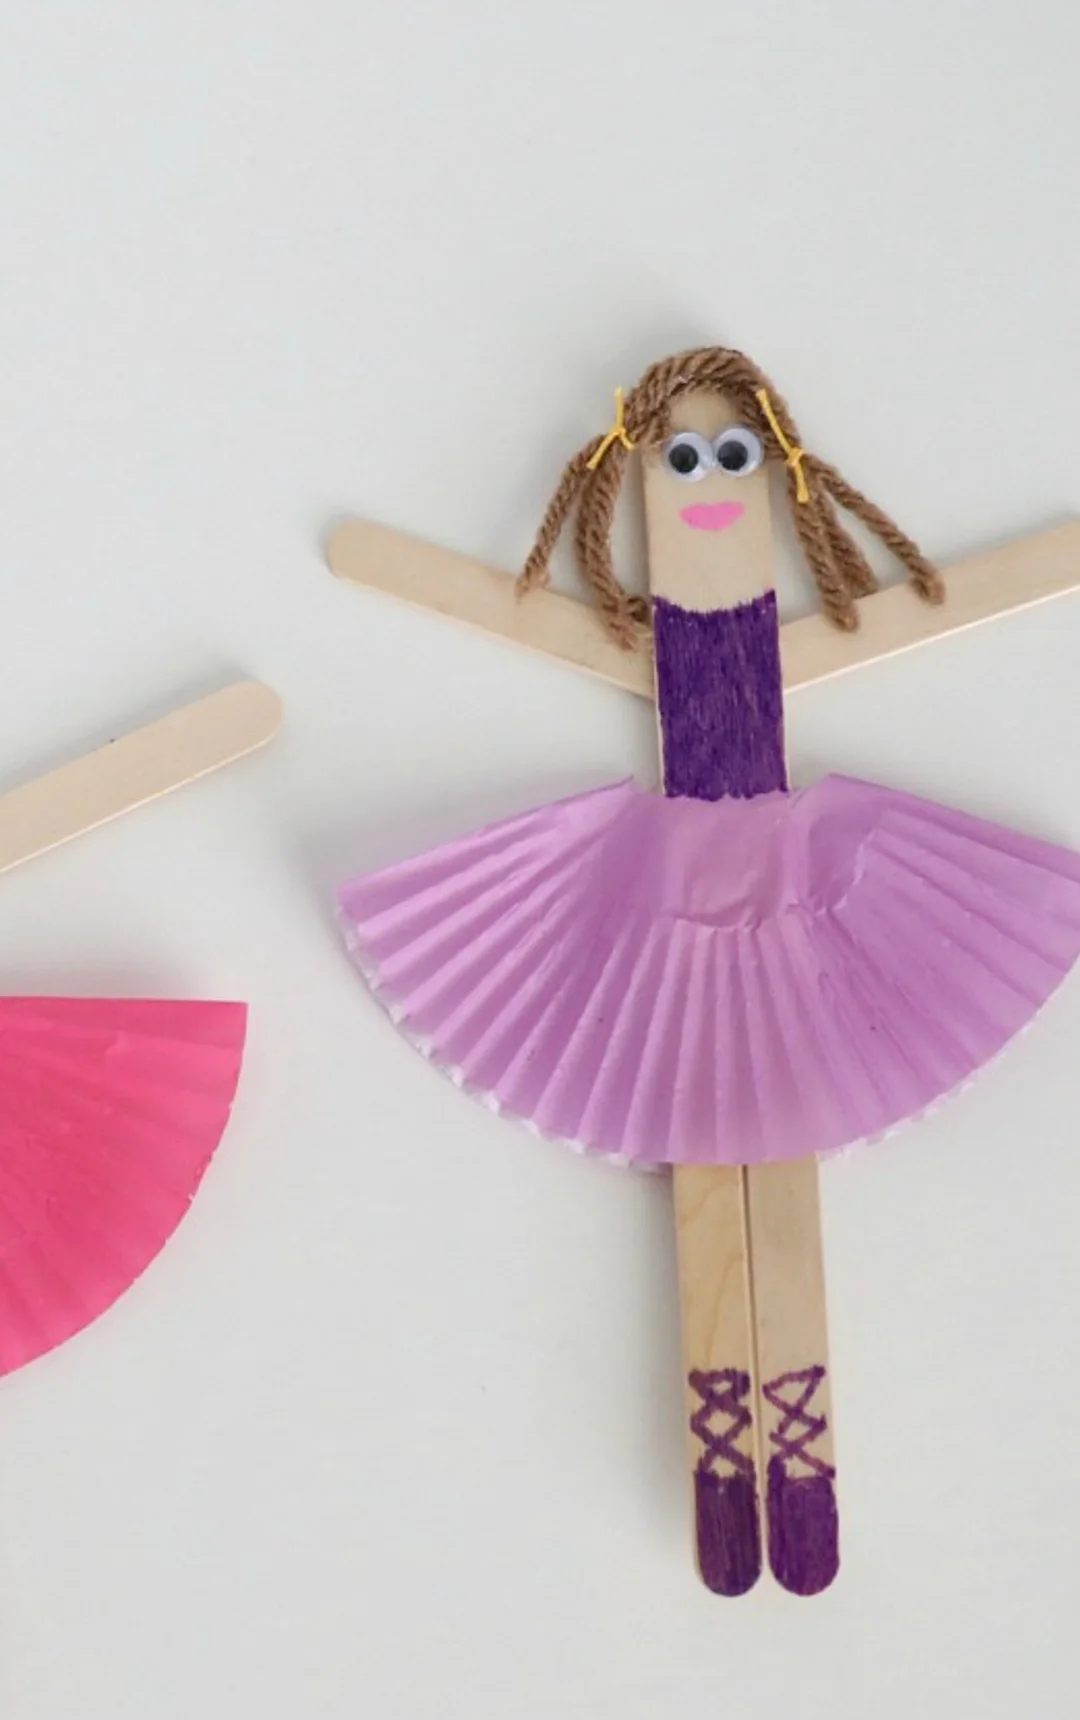
#12. Craft Stick Ballerina Figure
Supplies Needed:
- 1 craft stick (wider than popsicle sticks) per ballerina
- 3 popsicle sticks per ballerina
- Cupcake liners
- Yarn
- Sharpie markers (oil-based preferred)
- Googly eyes
- Scissors
- Hot glue
Instructions:
- Draw a leotard and shoes with a Sharpie, glue on googly eyes, and add a mouth. Your ballerina is complete!
- Take one craft stick and three popsicle sticks per ballerina. Cut one popsicle stick in half, or use mini popsicle sticks. Glue the halves to form the ballerina’s body.
- Trim a craft stick slightly and glue the remaining part to two popsicle sticks to create the arms and legs.
- Fold a cupcake liner in half, cut a small opening, and slide it onto the body to form the skirt. Glue it in place.
- Attach yarn for hair. For a “bun,” roll yarn into a circle and glue it in place.
Get the tutorial (with detailed steps and images)
#11. Craft Stick & Button Dragonfly

Supplies:
- Popsicle sticks
- Paint (optional)
- Pipe cleaners (bright colors)
- Buttons
- Pom poms
- Googly eyes
- Scissors
- Hot glue or Tacky Glue
Instructions:
- Finish by gluing on googly eyes.
- Paint the popsicle sticks (optional, but adds a nice touch).
- Fold pipe cleaners into wing shapes, securing the ends.
- Glue a pom pom to the stick for the head, then attach the wings.
- Once the glue dries, add buttons on the body and a button on each wing.
Get the tutorial (with detailed steps and images)
#10. Paper Clip & Felt Bookmark

Supplies for Bird Bookmark:
- Colored felt sheets
- Scissors
- Pencil
- Paper
- Hot glue gun
- Jumbo paper clips
- Needle & thread
- Glitter glue
- Black marker
How to Make a Bird Bookmark:
- Decorate: Add glitter, beads, or sequins for decoration.
- Gather Supplies: Prepare your materials and find a comfortable spot to craft.
- Create Bird Template: Draw different bird shapes on paper. You’ll need two templates for each bird and its wings.
- Cut the Templates: Cut out the bird and wing shapes from the felt, plus a small triangle for the beak.
- Cut the Felt: Carefully cut out the bird pieces, making sure to leave little excess fabric.
- Assemble the Bird: Glue the beak to the body and the wings on either side, leaving room for the paperclip.
- Attach Paperclip: Secure the paperclip by gluing or sewing it under the wing.
Get the tutorial (with detailed steps and images)
#9. DIY Puffy Paint

Equipment:
- Small bowl
- Straw or popsicle stick
Materials:
- 1/4 cup white glue (any brand)
- 1/4 cup shaving cream (roughly)
- Food coloring
Instructions:
- Use a paintbrush to apply the puffy paint to paper, dabbing it on generously for the best texture.
- Pour 1/4 cup of white glue into a small bowl.
- Add an equal amount of shaving cream. You don’t need to measure exactly—just estimate.
- Stir in a few drops of food coloring. Keep in mind the color will darken as it dries. About 10–15 drops per color works well.
- Use a straw or popsicle stick to mix.
- Repeat the process for multiple colors if desired.
Get the tutorial (with detailed steps and images)
#8. DIY Cloud Dough

Materials:
- 1/2 cup lotion (regular or baby lotion)
- 1 cup cornstarch (cornflour)
- Optional: Food coloring
Instructions:
- Knead the dough on wax paper for 5-10 minutes until it forms a dough-like consistency. If it’s too sticky, add a little more cornstarch; if too crumbly, add more lotion.
- Add 1/2 cup lotion to a bowl. If using food coloring, add 1-2 drops and mix.
- Gradually stir in 1 cup of cornstarch until well combined.
Get the tutorial (with detailed steps and images)
#7. Painting with Salt

Supplies for Raised Salt Painting:
- Thick white cardstock
- Liquid watercolors (highly concentrated)
- Salt (any kind)
- White glue (small nozzle for tracing)
- Paintbrush
- Water (small amount)
- Spring templates (download free by subscribing to our newsletter below)
Tips for Salt Painting:
- Use concentrated liquid watercolor, with minimal water for vibrant color.
- Dip the brush lightly to avoid excess water that could wet your paper.
- Paint once the glue dries, or immediately – either works.
- Place cardboard under the cardstock to avoid spills.
- To preserve your artwork, scrape off the salt once it falls off after drying.
How to Create Your Raised Salt Painting:
- Let dry. Once the salt falls off, scrape it off to reveal a vibrant watercolor painting underneath.
- Print your template on cardstock (download below).
- Trace the template with glue using a small-nozzle bottle.
- Sprinkle salt generously over the glue design, covering all lines.
- Shake off excess salt.
- Gently paint with liquid watercolors, tapping the brush above the design to let the salt absorb the color.
Get the tutorial (with detailed steps and images)
#6. Paper Handprint Bookmarks

What You’ll Need:
- Glue
- Paintbrushes
- Scissors
- Pencil
- Colorful paper
- Wooden sticks
- Paint
Instructions:
- Use glue or tape to attach the hand cut-out to the top of the popsicle stick, and decorate the stem with leaves.
- Gather your supplies. For younger kids, pre-cut the materials and let them handle the assembly.
- Lay down newspaper and paint the popsicle sticks in any color you like. Allow them to dry.
- Trace and cut out a hand shape from colored paper. Using your child’s hand adds a personal touch!
- Draw and cut out leaves from green paper.
Get the tutorial (with detailed steps and images)
#5. Fake Pom-Pom Cacti

Materials:
- Yarn
- Scissors
- Mini Terracotta Pots
- Hot Glue Gun & Glue
Instructions:
- Allow glue to dry and finish trimming as needed. Your faux cactus is ready!
- Make yarn pom poms using the handmade tutorial. Use green yarn for the cactus body (200 wraps on 4 fingers for large poms) and smaller colors for flowers.
- Test the shape by placing the pom poms in a pot—don’t glue yet.
- Trim the pom poms into your desired shape (round or oblong) and adjust the flower placement.
- Once satisfied, glue the cactus body into the pot and attach the flowers on top.
Get the tutorial (with detailed steps and images)
#4. Glitter Vinyl Tube Bracelets
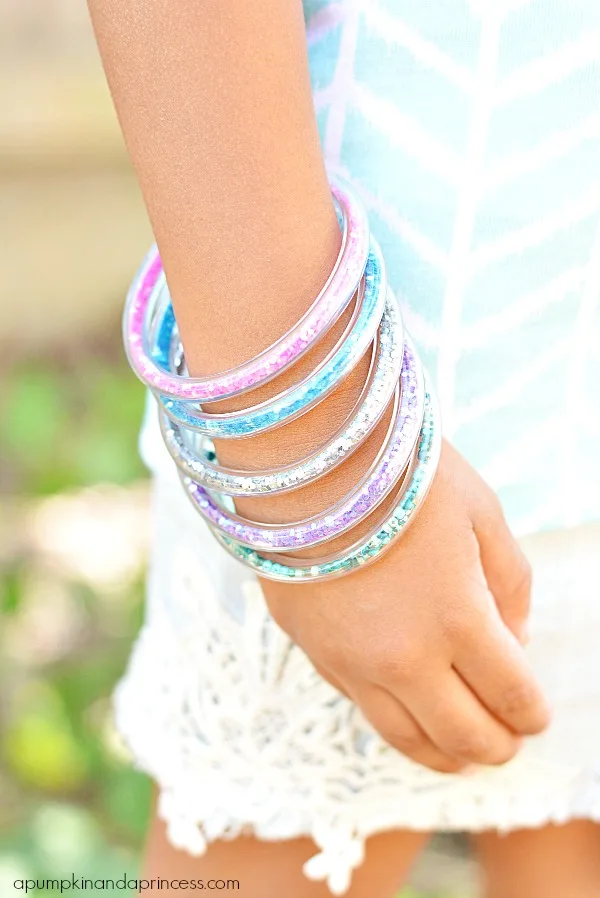
Supplies:
- 1/4” & 3/8” clear PVC vinyl tubing
- Glitter
- Tape
- Glitter funnel
- Scissors
- E6000 glue
Steps:
- Attach the 3/8” tubing to both ends of the 1/4” tube with E6000 or hot glue to seal the glitter inside. Let it dry, and your bracelet is ready!
- Measure and cut the 1/4” PVC tubing to fit your wrist, adding extra length for easy removal. Cut about 1 inch of the 3/8” tubing. (Find PVC tubing at Lowes, glitter funnel at Jo-Ann Fabric.)
- Use a small funnel to fill the tubing with glitter. Tape one end to prevent spillage while filling.
Get the tutorial (with detailed steps and images)
#3. Sidewalk Chalk’ Pops’
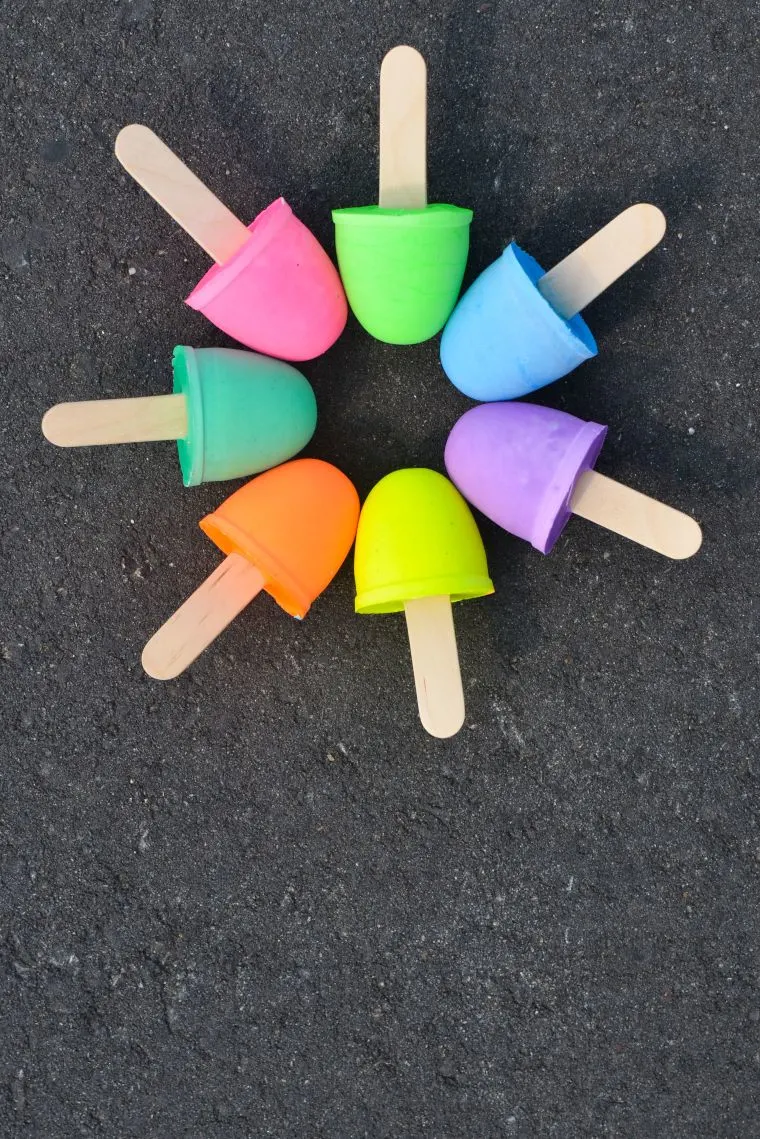
Materials:
- Plaster of Paris
- Tempera paint (neon recommended)
- Silicone pop mold
- Craft sticks (3″ long)
- Plastic cups & spoons
- Cold water (40-50°F)
- Scissors & measuring cups
Important Tips:
- Avoid pouring Plaster of Paris down the drain—it can clog pipes. Dispose of excess in the trash.
- This project can be messy—work outside and use larger cups.
- Use cold water (40-50°F) for best results.
- Tempera paint is non-toxic, but Plaster of Paris is not for ingestion—adult supervision required.
- Adjust measurements based on your silicone mold.
Instructions:
- Set molds in the sun for 1 hour to firm up. After 4 hours, remove from mold and continue drying.
- Cut craft sticks to about 3″ long.
- Prepare one plastic cup per color. Add 1/3 cup cold water and 2 tbsp tempera paint to each cup. Stir with plastic spoons.
- Add 2/3 cup Plaster of Paris to each cup, mixing until smooth (consistency of thin yogurt).
- Pour the mixture into the silicone mold, tapping to release air bubbles.
- Insert craft sticks into the center of each mold.
Get the tutorial (with detailed steps and images)
#2. Cupcake EOS Lipbalm
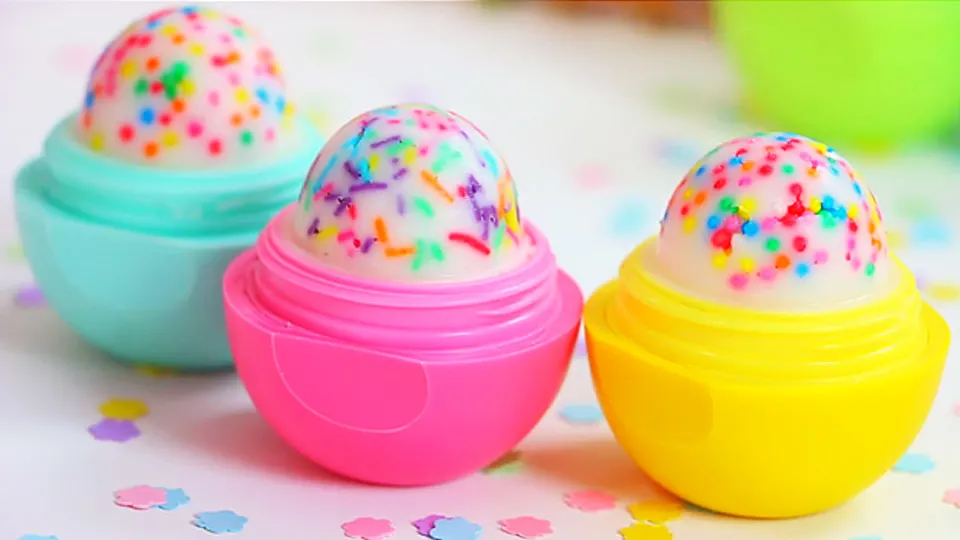
Supplies & Ingredients
- EOS container
- Plastic knife
- Small mixing bowl/jug
- Vaseline Petroleum Jelly
- Sprinkles
- Beeswax
- Coconut Oil
- Vitamin E capsule
- Vanilla
- Cotton bud
Step 1:
Remove any excess lip balm from the EOS container. Cut and clean the center part to make space for your new balm.
Step 2:
Using a cotton bud, apply a thin layer of Vaseline to the EOS lid. Sprinkle some sprinkles over the Vaseline to help them stick.
Step 3:
In a bowl, mix 1 tbsp of beeswax, 1 tbsp of coconut oil, a Vitamin E capsule for extra softness, and a few drops of vanilla for fragrance.
Step 4:
Place the bowl over simmering water to melt the mixture.
Step 5:
Once melted, pour the lip balm into the EOS lid. Replace the center part and add a little more balm for a neat finish.
Step 6:
Refrigerate the EOS container for a few minutes to set the lip balm.
Get the tutorial (with detailed steps and images)
#1. Pipe Cleaner Finger Puppets

Supply List
- Pipe cleaners
- Pom-poms (1/2″ – 3/4″ in diameter)
- Small googly eyes
- Glue gun
How to Make Pipe Cleaner Finger Puppets
- Attach googly eyes.
- Watch our quick video to see the process, then follow these steps:
- Wrap a pipe cleaner around your finger 3-4 times, leaving half unwrapped.
- Fold the unwrapped end to create two ears and secure the middle.
- Glue a pom-pom where the ears meet to secure your puppet.
Get the tutorial (with detailed steps and images)
What age range is appropriate for kids crafts?
Kids crafts can be enjoyed by children of all ages, from toddlers to teenagers. However, it’s essential to choose age-appropriate projects that match your child’s skill level and interests. Always supervise young children and provide assistance when needed.
How can I make crafting less messy?
Set up a designated crafting area and cover the work surface with a tablecloth or newspapers for easy cleanup. Use washable paints and markers, and consider crafting outdoors or in a space that’s easy to clean, like the kitchen or garage.
What if my child loses interest in a craft project?
It’s normal for children to lose interest in a project, especially if it’s too challenging or not engaging enough. Try breaking the project down into smaller, manageable tasks or switch to a different activity that captures their attention. Encourage them to come back to the project later when they feel inspired.
What supplies do I need to get started with kids crafts?
Basic crafting supplies include paper, crayons, markers, paint, glue, child-friendly scissors, and recyclable materials like cardboard boxes and plastic bottles. As your child’s interests grow, you can expand your supply collection to include items like beads, yarn, fabric, and clay.