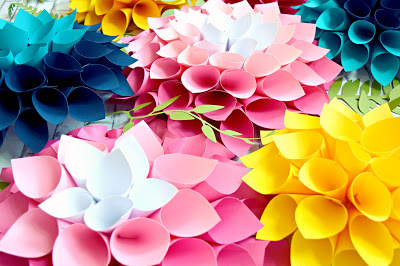
These giant Dahlia Paper Flowers are so incredibly beautiful once made. I had fun creating an ombre effect by using different shades of cardstock paper. What’s better is these dahlia paper wallflowers are beginner-proof and kid-friendly!
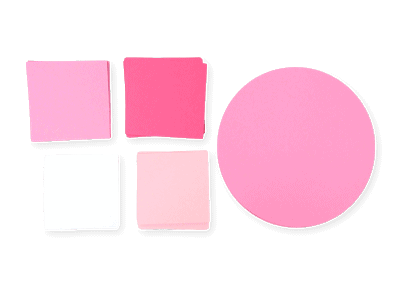
It may surprise you that the large dahlia paper flowers templates are made using just some specially sized circles and squares. Because the templates are so simple these dahlia paper flowers are easy for those cutting by hand with scissors.
Supplies For Making Giant Dahlia Paper Flowers
- Glue Gun
- 65-pound cardstock
- Scissors and/or cutting machine ( a Cricut Maker or Cricut Explore Air 2 Machine will work)
Cut Out Your Paper Dahlia Petals
As I mentioned above the giant dahlia paper flowers are made from 2 basic geometric shapes—a large 8-inch circle for the base and several 4.5 inches and 4-inch squares rolled into a cone shape. Start with cutting out 40 of the 4.5-inch squares and 15 of the 4-inch squares. It’s important to note that the final count of squares used may vary for everyone.
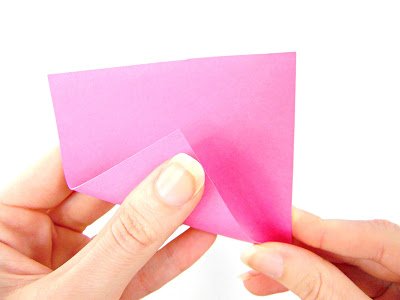
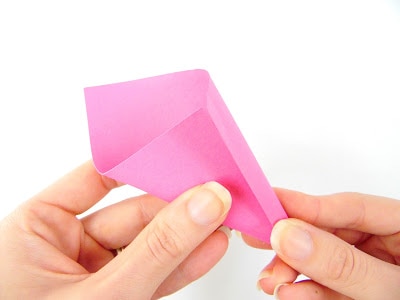
Shaping Your Dahlia Petals Into Cones
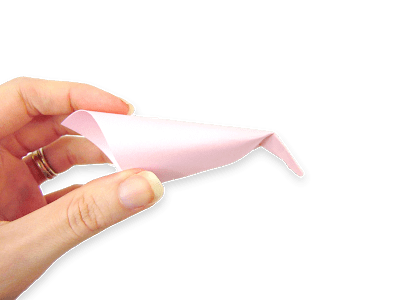
To form a cone, hold the square with one corner up and overlap the bottom, securing with your hot glue.
The 8-inch circle will be your base for gluing the cones to. If you want a variety of sizes of dahlia paper flowers you can do this by increasing or decreasing the circle base and adding or subtracting cones.

If you are aiming for the ombre effect or a rainbow dahlia, choose 4-6 shades of one color to use progressively as you work towards the center. I used 5 shades of pink and then white for the center of the dahlia flower.
How To Make Large Paper Dahlia Flowers
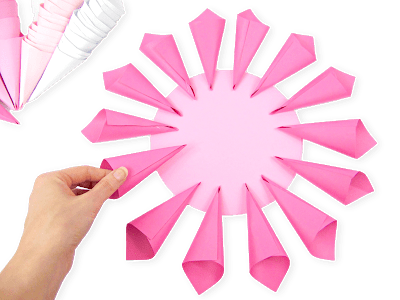
Beginning with your larger cones made from the 4.5-inch squares, glue the tips to the outer edge of the circle all the way around. Make sure to leave about a 1/2 inch or so of space between each cone as you go.
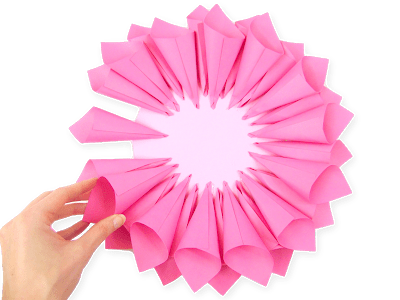
Next, continue adding more cones to your dahlia paper flowers. Place the cones in the spaces we left between the first layer of petals we glued down.
You would have moved on to your 4-inch cones now. Continue the pattern and keep filling in more of the dahlia petals.
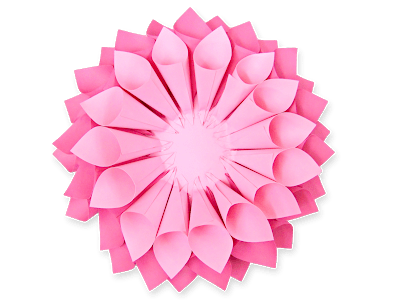
Once you get down to the last dozen or so of the cones, they will naturally bend at the tip when you glue them down. This is what you want so that the final look is a tight dahlia center. You may need to grab a thin wood dowel or pencil to press the tip down. You want to ensure it makes good contact in the center with the glue.
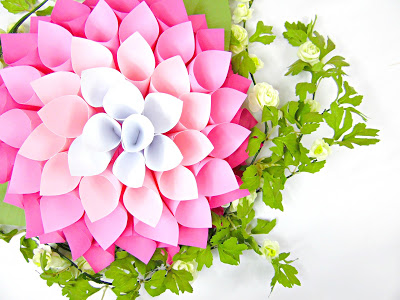
Once you have glued in your final petals your dahlia paper flowers should look something like the image above.